Water Restrictions & Pool Covers

While water restrictions are nothing new to many areas of Australia (such as Tamworth residents who are currently at level 5), this is the first time Sydney has been affected since 2009.

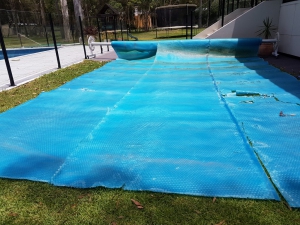
As a pool owner, one of the most effective ways you can save water is by using a pool cover. An Oasis Solar Pool cover has been independently tested, and proven to prevent up to 99.84% of evaporation.

All our Oasis Solar Covers are licensed under the Smart Approved WaterMark, endorsed by the Water Corporation’s Waterwise program and carry the newly created Climate Care Certification from SPASA.

If your local area has recently introduced water restrictions, it’s likely that having a pool cover with one or all of these qualifications is required in order to fill or even top up your pool.

If you registered your warranty with us and require a copy of your cover’s compliance certificate, just send us a message and we’ll be able to send you a copy. Your pool shop can also log into our trade website and download a copy for you too.

If you’re not sure what your local restrictions are, check with your local council or water authority – they will have the most up to date information for you.

Water Loss. Is it evaporation or a leak?

If you’re noticing your water level dropping faster than usual, it’s a good idea to check if its due to evaporation or a leak.

The first thing you should do is what they call a ‘’Bucket Test”.

How to do the Bucket Test:

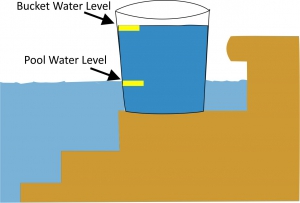
  1. Fill a bucket with pool water, about 3cm from the top.
  2. Put the bucket on the first step of your pool.
  3. Turn off your pool pump.
  4. Using a permanent marker or pieces of waterproof tape, mark the water levels both inside and outside of the bucket.
  5. Turn your pool pump back on.
  6. Wait 24 hours, and compare the water levels.
How to do the 'bucket test'.

If the water level on the outside of the bucket has gone down more than the level on the inside, it’s likely you have a leak.

If the water level on the inside of the bucket has gone down by around the same rate, then your water loss is caused by evaporation. This can be resolved by using a pool cover.

Fact #6. Is it ok to leave my solar bubble type cover rolled up in the sun when I’m not using it?

No. You should never leave a solar cover rolled up in the sun – even for a short period of time.

The nature of a bubble cover is to allow the suns rays to penetrate through the bubbles. When rolled up on roller or reel, these can build up heat internally through the multiple layers to the point of expanding the bubbles, over-heating the plastic and in extreme cases,  melting the layers together! The expansion of the bubbles on the flat side of the solar blanket is evidence the cover has been exposed to heat and the Sun when not on the pool. This can cause the cover to appear to shrink in size as the upward expansion of the bubbles, causes the cover to contract and measure less than before the bubbles were expanded.

The excess heat can cause a premature degradation of the plastic in sections across the blanket around the width of the rolled up blanket (around 300mm)  and 900mm apart which is commonly known as “Roller Burn”. This caused by not covering the blanket when it is rolled up on the Reel. The way to avoid this is to always cover the blanket when rolled up on the aluminium tube of the Roller Reel.

Again, you can confirm this by looking at the flat side of the bubbles and seeing if the layer is flat or slightly indented (normal) or raised a little, and this means the blanket has been exposed.

You cannot reverse this damage, but you can prolong the life of the pool cover by preventing any further exposure. Always use the ‘Overcover’ provided with your reel/roller to protect the solar blanket when stored.  If you do not have an overcover, you can purchase one from your poolshop, or you could make one using a reflective tarp.

ABGAL supply an overcover with all Hydrotools branded reels. It is a white, heat reflective poly tarp fabric with a cord at each end, designed to slip over the rolled up solar blanket pool cover.

My glass pool fence has exploded – how do I clean it up?

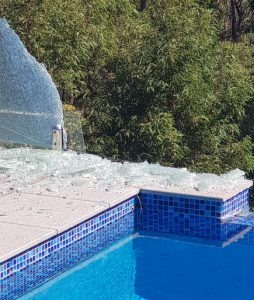
It’s one of the things you hope never happens to you. Maybe you were there and heard a loud bang – or perhaps, you didn’t know it happened until you looked at your pool and noticed a glass fence panel missing.

While it’s not common, it’s certainly not unusual for glass pool fences to suddenly shatter without warning. (Normally into a thousand pieces – all over the pool deck and sometimes inside your swimming pool!)

It happened to me just last week and this was the second pool fence panel to shatter in three years! On both occasions, we have been fortunate that no one was near the pool at the time, so all we’ve had to deal with was replacing panels and cleaning up the broken glass.

The first time, it just made a mess over my timber deck, but this time, a lot of glass fell into the pool. My pool has an Aqualux vinyl interior as they are so nice to the touch, and I must admit, I was a little worried falling glass may have cut through the surface.

I Googled “how to clean glass from your pool” and there were a few articles, but not many relating to an “exploding fence panel” so I thought I would share my experience to help others.

My immediate thought was to vacuum the broken pieces using the pool vac. I placed two skimmer socks inside the skimmer basket to trap any glass fragments and stop them flowing through to the filter. Then I connected the vacuum and proceeded to slowly move across the glass pieces.

This was my first mistake as although the fence shattered into small 10mmx10mm size pieces, many of them were clumped together and too big to fit through the vacuum head opening or suction hose.

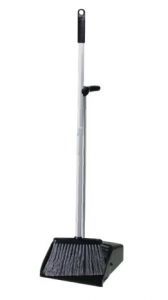
So I changed tactics – this time opting for a handheld broom and long-handled dustpan.

This worked a treat!  Working very gently and slowly, I broomed pieces of glass into the pan, just a little at a time, so I could easily lift the dustpan out of the pool (without dropping any pieces) and empty the glass into a large bucket.

I repeated the process until I had swept up all the pieces that I could see. By the way, it is much easier to see glass in the pool in full sun as the glass reflects under the water.

After removing all the large pieces with the dustpan and broom, I vacuumed the entire floor area carefully to pick up smaller slithers.

Total clean up time took about 2 hours.

A week later, I am very happy to report that my pool fence company has replaced the panel, and my Aqualux pool finish was up to the challenge, and proved tough enough to withstand the glass and has no cuts or leaks!

7 Ways to destroy a solar pool cover and void your warranty

  1. Not turning down automated chlorinators after a solar cover is installed. A cover reduces chlorine consumption by around 50% – if the chlorinator is not turned down, it will produce too much chlorine, and damage the cover. If your chlorinator is already running on its lowest setting, you can reduce the running time slightly, or add fresh water as needed.
  2. Not removing the cover after super chlorination. If you super chlorinate, always remove the cover first, and do not replace it until after chemical levels have returned to normal.
  3. Not keeping chemical levels to within the Australian Standard. Even being slightly over for a prolonged period of time will cause bleaching and brittleness of the cover. We recommend you test your pool chemicals regularly. You don’t need a full breakdown from your pool shop every weekend – just a quick check at home with some test strips is sufficient.
  4. Leaving a floating chlorine dispenser under the cover. While a floating chlorine dispenser is ok, they don’t float so well when they’re jammed under a cover. They will simply sit there, and cause a large concentration of chlorine in one area – and will damage your cover (causing bleach spots/burn), and probably damage the pool finish too.
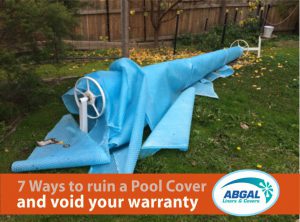
  5. Leaving the cover exposed to sunlight when not on the pool. Solar covers are designed to attract and store heat. When a solar cover is rolled or folded, each layer gets hotter, and the temperatures build up through each layer. We have seen covers which have gotten so hot the layers closest to the reel have literally melted and fused together. To prevent this from happening, all ABGAL cover rollers are supplied with a protective overcover, which must be used when the cover is not on the pool.
  6. Improper storage. This picture? It wasn’t staged. It was literally what we saw whe7-ways-to-ruin-a-pool-cover-and-void-your-warrantyn we went to visit a pool owner – and they knew we were coming!! They didn’t want it on the pool at the time, so they’d ‘moved it out of the way’ for a few days. When on a reel, or folded, a blanket should be covered with a heat reflective cover. If storing for an extended period of time, it should be rinsed with clean water, and allowed to dry thoroughly before storage – and stored in a covered and protected area, at below 45 degrees celcius.
  7. Incorrect positioning on the pool. A solar cover shouldn’t be dragged over the pool deck, decorative rocks or sharp coping. And it should be cut to shape, so that it moves easily on the water. We’ve heard of people leaving them in a rectangular shape on a kidney shaped pool, then holding the edges down with bricks and rocks to stop them blowing off in the wind!

Are you thinking of buying a robotic pool cleaner?

In the past, almost everyone used a suction cleaner or pool vaccuum, and we all became accustomed to swimming around the hose, and listening to that ‘tick tick tick’ sound whenever we were near the pool!vacuum hose
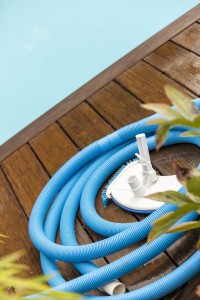
However, in the last few years, robotic cleaners have become quite affordable, so are gaining popularity with pool owners. But while it is true that a robotic cleaner can be used in any pool, not every robotic cleaner is suitable for every pool.

If you have an abrasive pool surface such as pebble, you’ll need a cleaner that is strong enough to scrub the surface clean, and durable enough to tolerate any wear against the cleaner skirting.

On the other hand, if you have a soft and flexible surface finish such as vinyl, you need to ensure a robotic cleaner has no sharp edges, and that the tracks and rollers are gentle enough to not cause wear on the pool finish. With all pool finishes, it is also important to ensure there is enough clearance on the underside of the robot to avoid rubbing and scraping against the surface.

So which is better to use? Robotic or suction? It really is a matter of opinion. Suction cleaners have been the norm for many years in Australia, and they generally do a pretty good job, for a very reasonable price. But all pools are different, and no cleaner is perfect (there is usually a corner or step, or some other spot in every pool where the suction cleaner always seems to miss!)

Plus you have to wrestle with the cleaner and hose when you want a quick swim as most pool owners just don’t bother to remove the vacuum from the pool. And when you do finally take the vacuum out, no one ever lays the hose out nice and straight, to minimise any effects of hose kinks on the cleaner’s performance. (Suction cleaners rely on the hose to help control the area they cover and the direction they take).

I’ve personally owned a number of suction cleaners over the years, and a couple of robots, so I thought I’d put together some of my thoughts, to help anyone who is tossing up between a suction cleaner and a robotic cleaner.

Robotic cleaners are designed to be put in the pool once or twice a week for up to 2 hours to roam around the pool in a random pattern and vacuum all the dirt and leaves from the floor and walls. The biggest issue I have with robots is the cleaning! That’s right – you need to clean the cleaner! They need to be cleaned every time they do a full pool clean.

I liked my suction cleaner’s handling of the dirt and leaves, it just sends it all to the pool filtration system. I found my sand filter much easier to clean than the cartridges of the robot – it was just a matter of switching off the pump, turning the valve, then running the pump until the waste water was clear, selecting rinse for a minute and then back to normal filtration. Quite easy really, and only takes about 7 minutes.

The robot takes about 7 minutes each time I clean it – and I have to do this at least every week – whereas I only backwash my sand filter every 4-6 weeks. However, I love the fact that my pool has NO cleaner in the water most of the time and no annoying “tick”, “tick” sound or the surface of the water rippled all the time.

And, when I go for a swim, I jump straight in and don’t have to remove the suction cleaner and store it alongside the pool edge. Now putting the robot in the pool and getting it back out requires a bit of strength, especially getting it out when as you have to wait for the water to drain out before lifting it otherwise it is quite heavy.

Now – the effect of the cleaners on your pool finish. The suction cleaners are often left in the pool all the time as some people choose to swim with them as it is easier. The problem is, for 8 or more hours a day in summer, the suction cleaner is rubbing over the pool surface. If you have an abrasive surface, this will wear the cleaner skirt and some other parts. If you have a soft surface such as PVC, the suction cleaner can rub and wear the surface over time, and if it doesn’t move evenly over all parts of the pool, you may see its common path in form of a wear track, usually around the wall to floor junction.

The concept of a robot being more compatible with all pool surfaces comes from the fact they are only used for a short period of time – BUT you need to make sure you have the correct tracks and rollers for your pool surface finish.

If your pool surface is quite abrasive, then the robot will have less wear on its tracks and rollers as it is only used for relative small amounts of time, but the wearing parts need to be compatible otherwise you will need to replace them quite quickly. If your pool has a soft finish, the robot makes sense as again it is only used for small amount of time, but you need to make sure the areas of contact with your pool finish are compatible so as not to create wear spots.

One of the considerations for your pool before you purchase a robot if you have a softer finish is to ensure the shape of the surface is free of sharp edges, and that there is enough clearance of the underside of the robot to avoid rubbing and scraping these edges, as the hard plastic of the robot body can cause abrasions.

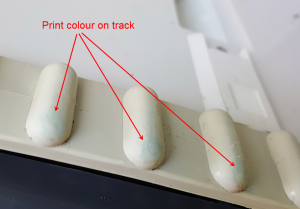
If you ever suspect your robot has caused abrasion to your pool finish, just check the tracks and the underside of the unit – you will likely see some of the pool surface colour on it and maybe some worn plastic parts.robotic cleaner print rub off on tracks
So in my opinion, if you are on a budget or don’t mind swimming with the hose and cleaner, or removing it every time you swim, a suction cleaner will work for you.

If you want the clean look of a pool without a hose and cleaner 99% of the time and happy to rinse off the cartridges after every clean, then a robot will suit you.

Remember, no cleaner is perfect, but they sure beat having to set up the vacuum hose, handle and brush and cleaning the pool manually yourself!

 

Pool Shops: How to give your customer a 10 year warranty on a pool cover

warrantySick of losing pool cover sales to that faceless stranger who continues to undercut you on ebay? You can’t beat them on price, but you can beat them on service. Talk to your customer, and help them choose the right product for their needs.

Offer an installation service too – not only do you make a few extra dollars , but by ensuring the cover is installed correctly, you extend their warranty. That’s right – we will extend the warranty on all 500 micron Oasis covers to a whopping TEN years (pro-rata), when profesionally installed.

The extended warranty is only on professionally installed covers, to give you an edge over web sales. All you need to do is arrange for a professional installation of the solar cover, and make sure your customer quotes the name of the installer when registering their warranty with us – we automatically upgrade their warranty from 8 years to 10.

Changes to Coral Sand print pool liners

As of Coral-Sand-web (Large) (Medium)today, all Coral Sand print above ground pool liners will have a change of the base film colour from white to beige. The beige film has no significant effect on the appearance of the print, but means the seams look better and gives the pool a little more depth of colour.

Coral Sand has a real pebblecrete appearance, and gives the pool a pale blue/turquoise hue when filled with water.

How to prepare a rusted water tank before installing a tank liner

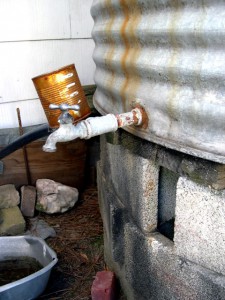
Water Faucet RustIf you find your water tank has some surface rust, here is the process for treating it prior to the installation of the liner.

You will need enough rust converter / metal primer to cover the rusted area, and enough plastic film sheet to cover the treated area.

First ensure the rust is only surface rust and the tank is sufficiently strong enough to hold the weight of the water when it completely full. If in doubt, seek some expert advice on the structure of the tank before fitting the liner and filling it with water.

Using a wire brush, remove the loose surface rust from the inside of the tank. Treat the area with “rust converter/metal primer” available from your local hardware supply. Follow the instructions for applying the converter/primer, paying particular attention to working within a confined space.

Allow the converter / primer to completely dry and then install a protective sheet between the tank surface and the liner. You can use a Painters plastic drop sheet or builders film for this. If you are fastening the tank fixing extrusion at the top of the tank, you can secure the plastic sheet under the extrusion as you drill and rivet it in place. Add a layer to the floor of the tank if it has been treated with the paint primer and then using duct Tape, secure it in place before fitting the liner so it doesn’t move.

The plastic film sheet will act as a protective barrier between the rust converter/metal primer and the liner.

Is Aqualux suitable for a Glascon Pool?

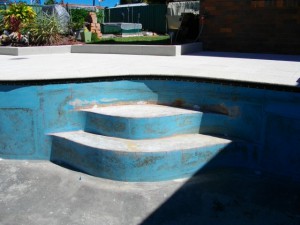
A Glascon pool is a little unusual, as it has fibreglass walls and a concrete floor. The construction of this pool is a mix of two styles used for swimming pools – firstly – the wall is made from glass reinforced plastic (commonly known as ‘fibreglass”) and the floor is reinforced concrete.

The fibreglass wall has a smooth gel coat finish and was usually blue in colour, and the concrete floor was either painted or finished with a waterproof marble render. The problem with this system is, there is no chemical bond between the concrete and the fibreglass, so there is a risk of leakage at this joint. If there is some ground movement over time, the joint can open up slightly and pool water will leak out of this join, between the two structural elements.glascon-pool-steps-ready-for-measuring

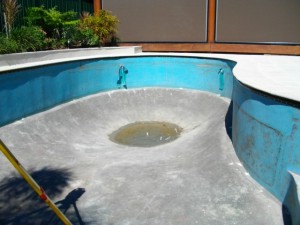
The simplest and easiest way to fix this leaking, is to install an Aqualux pool finish. The design of the Glascon pool is similar to a prefabricated vinyl pool and therefore it is a very cost effective and straight forward process. The pool has an even wall height all the way around, and the floor slopes down into a bowl sort of shape to make the deep end. Having vertical walls means the vinyl finish will be economical and easy to fit. The pool just needs some simple preparation of new eyeballs fittings suitable for vinyl, a fixing extrusion fitted at the top of the wall and a face plate or under water extrusion around the skimmer opening.

The empty pool is measured for the Aqualux finish, which is made into a one piece waterproof membrane at the factory and then fitted in a day and the pool filled back again with water.

An Aqualux PVC membrane is an excellent solution to a leaking Glascon pool.

glascon-pool-wall-floor-leaking