How do I get rid of the scum line around my pool?

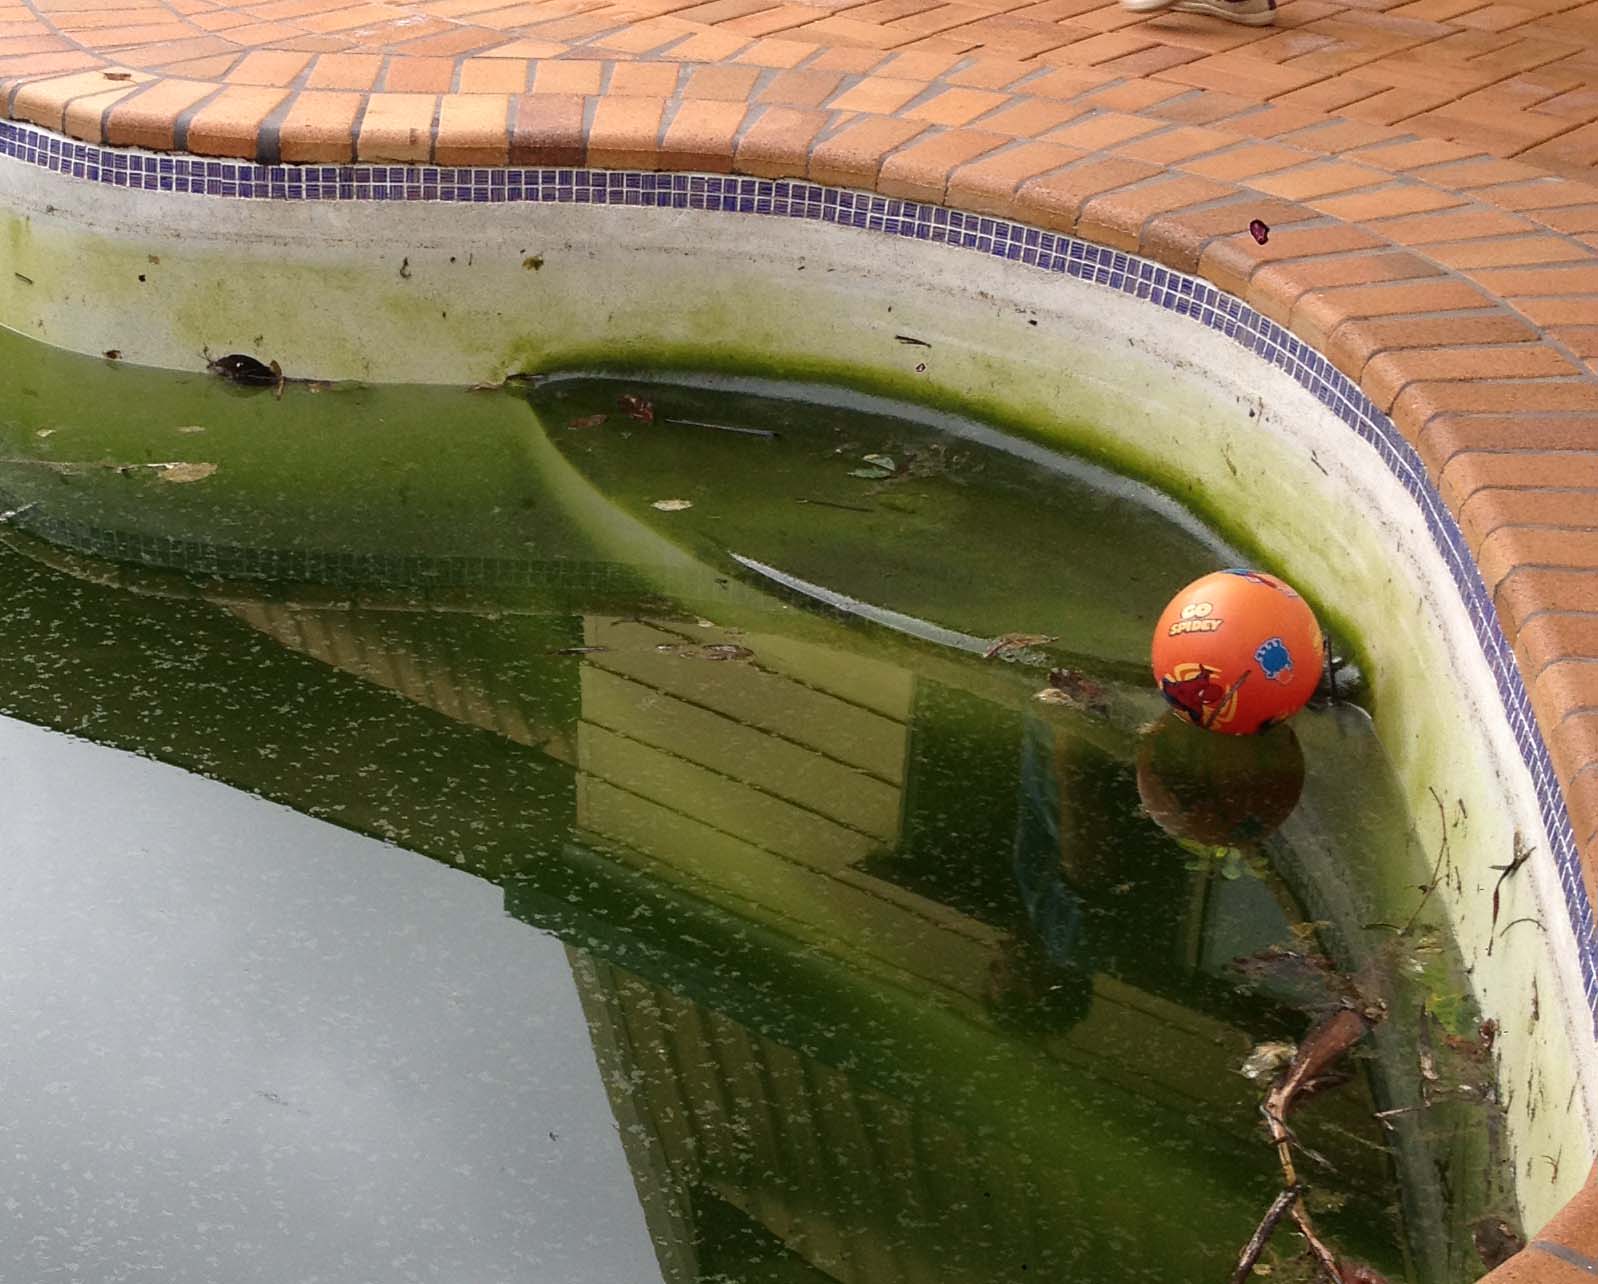
Had extra people in your pool lately? You may have noticed a ring of grime around the waterline. If it’s a yellowish colour and feels a bit greasy to the touch, it is more than likely a combination of sunscreen, moisturisers, dead skin cells and body oils etc – it sounds gross, but they can float on top of the water and stick to the walls.

If you have a vinyl-lined interior such as Aqualux or a fibreglass shell, you can usually just wipe it straight off with a microfibre cloth. Get it while it’s fresh and you won’t need any chemicals – just a quick wipe will do it. (It’s even easier if you can throw the cloth at the last person in the water and get them to wipe the waterline down before they get out!)

Anyone who routinely gets a lot of waterline scum in their pool may benefit from using a chitosan-based clarifier such as our Vinyl Care & Protect or the Lochlor Ultra Kleer 4 in 1- products like these bind the fats and oils together and allow them to be filtered out, so they don’t sit on top of the water – thus preventing the scum line appearing in the first place.

Throwing a couple of clean, new (and fuzzy) tennis balls into the pool can also be helpful – as they float around they will pick up oil from the surface – just be sure to change them over regularly.

If you’re lucky enough to have a shower by the pool, a quick 10-second shower before jumping in goes a long way to reducing the amount of contaminants too.

If you can see a ring of grime has appeared on your pool waterline and you think it’s been there for a few weeks, you may find a gentle wipe is not enough, as a scum line left in the sun for weeks on end can become quite difficult to remove. If a quick wipe with a cloth isn’t working, spray with a vinyl waterline cleaner product and wipe off with a soft sponge (the sort you wash the car with – NEVER A MAGIC ERASER, and please don’t use microfibre with anything other than your pool water – don’t apply chemicals or cleaning products with microfibre).

Another product often used with success (which you probably already have under the sink) is Jif! Just a tiny amount on a sponge, and wipe gently. If that doesn’t clean it off, resist the urge to rub or scrub at it – if the grime has been allowed to “bake on” in the sun, it can become embedded in the surface. In this event, the best approach is to add a chitosan-based clarifier to the pool. Raise the water level to above the stain, then wait for the clarifier to work its magic.

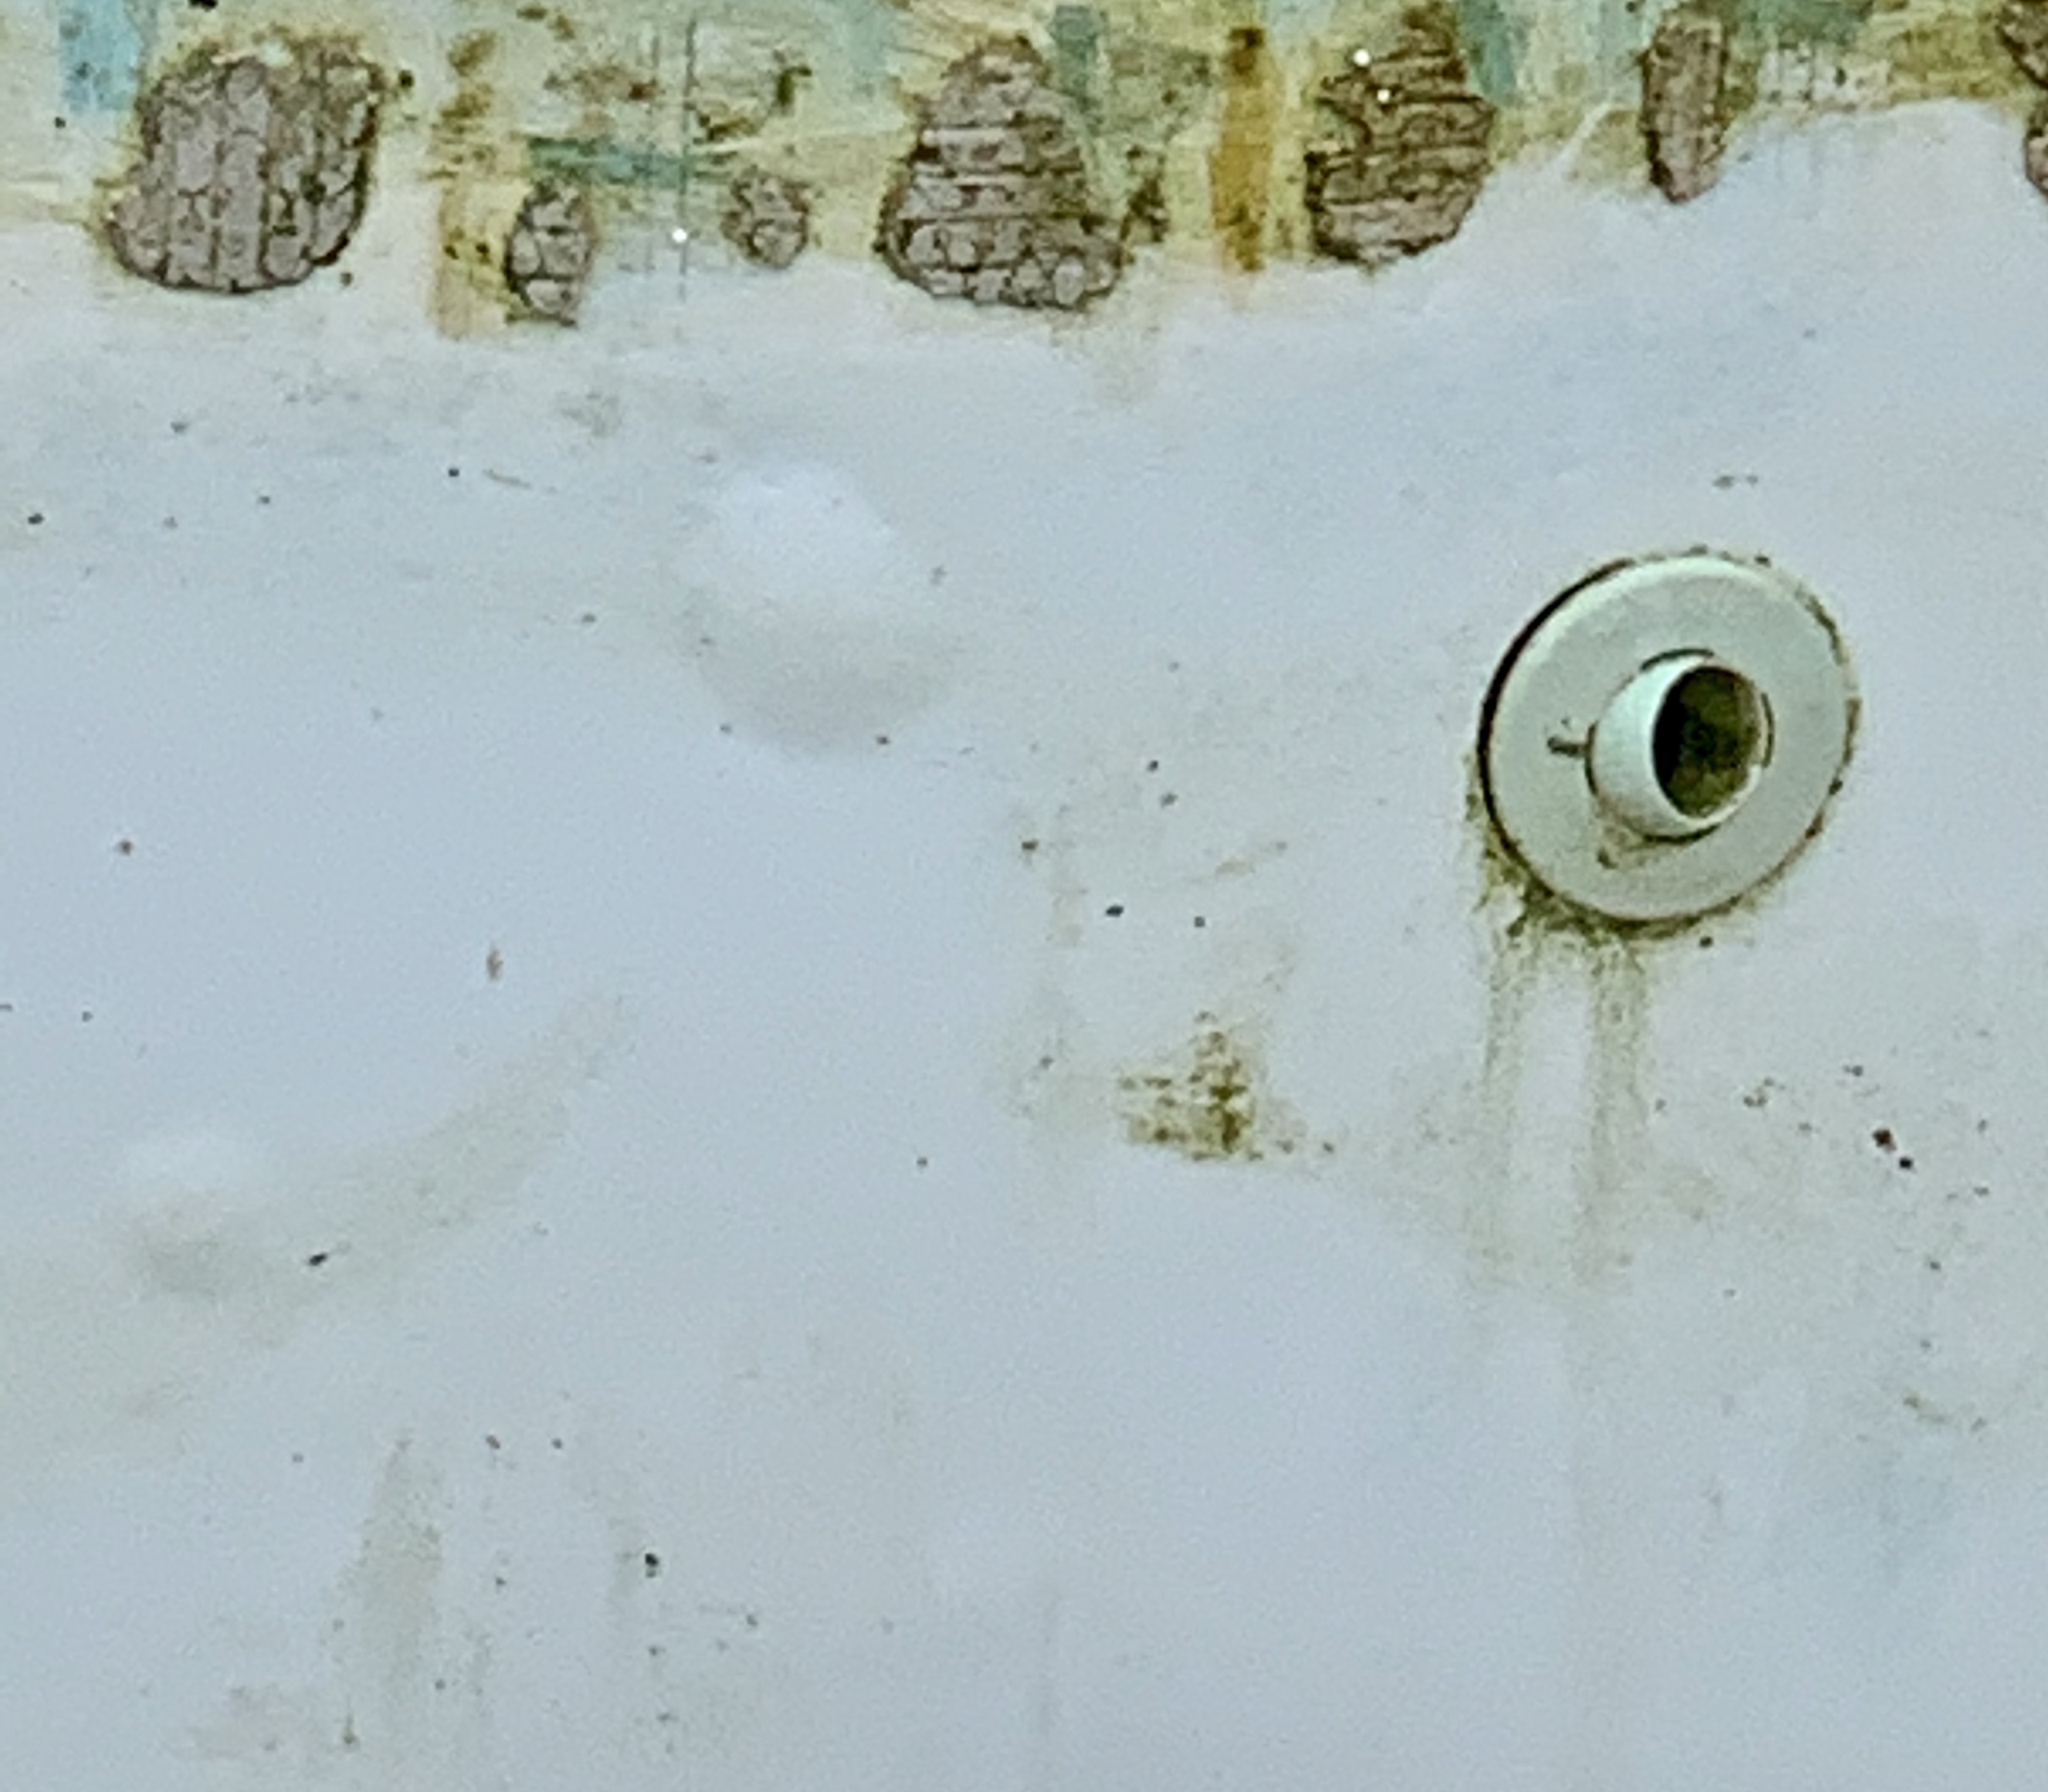
If the ring is more of an orangey yellow, and doesn’t feel greasy at all, it’s possible it could be a chemical reaction between sunscreen and copper. The above suggestions should still help, but it’s important to remove the cause.

Copper is most commonly introduced into a pool through copper-based algaecides, so if adding an algaecide into your vinyl-lined pool, ensure it is not a copper-based one. Sunscreen/copper stains can appear quite literally overnight and are more likely to occur on the walls that get the most sun. Some brands of sunscreen seem to be worse than others, but if you find your swimwear or pool towels sometimes get orange stains after washing, or you have acrylic fingernails which turn a little orange or yellow after swimming you may like to try an alternative brand. Avobenzone and oxybenzone are common ingredients in sunscreens that seem to have this issue.

Choosing your pool interior colour

Once you’ve made the decision to build a pool (or renovate your existing pool) with an Aqualux pool finish, the next difficult decision to make is ‘Which colour or pattern do I pick?’.

When we started making pool liners back in the 1970’s, it wasn’t a difficult choice – light blue or dark blue! Now, there is always at least 14 Aqualux colours to choose from- often 16 or even more. Most people will start their decision-making process online – looking at photos of pools. And while that can be a terrific help, it can also be a little overwhelming, as the same colour can look completely different in another pool (and even in the same pool!).

Aqualux in ‘Antique’ looks completely different in each of these pools. Water chemistry, landscaping and lighting are all factors.

How can the same colour look so different?

Once your pool has been filled, you’re not really looking at the liner colour anymore – you’re seeing the water in front of the liner – and this is where physics plays a part.

Clean water has no colour – so when you put it in a glass, it looks clear. But in a large body of water, such as the ocean, a swimming pool or even a spa filled with the same water, it will appear blue or green. This is because light is made up of all the colours in the spectrum, and when it hits an object, the object absorbs some colours, and reflects others. When light hits the water, the water will absorb the red, and reflect back blue. So even in a pure white pool, the water will always appear blue.

There are many other factors that will affect the watercolour too. Size and depth of the pool, landscaping and surrounds, water balance and of course lighting all play a huge part in determining the look of the watercolour – and this is why it can be so hard to select the right liner colour for your pool.

If you’re struggling to decide on a colour, the first step is to decide if you want a light coloured pool or dark.

Benefits of a darker pool interior include a warmer pool, which will look cleaner – even if it’s not. The darker the interior, the harder it is to spot dirt, leaves and other stains in the pool. In contrast, the lighter the pool interior, the more obvious any dirt or leaves are – so if you live in an area with lots of dust or leaves, and you don’t think you’ll be able to keep on top of the cleaning, then you may like to stick with a mid to dark coloured pool – or invest in a leaf and debris cover.

Blue water or Green?

If you are looking for a green, aqua or turquoise pool, you don’t have to pick an obviously green pool liner like Maldive – anything with tan or yellow (such as Aqualux Sandstone and Coral Sand) or black colouring (like Antique and Kiama) also usually throw green.

Viewing distance

If you’re converting over from a plain painted or fibreglass finish, you may initially find some of the patterns of Aqualux a little ‘bold’- however, don’t get too caught up in the print you see on the sample. The patterns are designed this way to give your pool the most vibrant appearance possible, and the more contrast in the pattern, the more depth of colour your pool will give.

The patterned surface also helps to hide any flaws in the pool shell – so the more contrast in the pattern, the better job it will do of disguising imperfections – definitely something to consider if you are resurfacing a pool with Osmosis.

Remember, you’ll generally be looking at your pool interior from at least a couple of metres away, and most of it is underwater (or all of it, if you’re having a waterline tile) – so while a pattern may seem a bit busy when you look at it up close, it will look far more subdued once installed.

Contrast or Blend?

This is another decision that is generally fairly easy. Do you want your pool to blend with your garden, and look like a natural addition, or do you want it to ‘pop’? For a natural, muted appearance, select a colour that tones in with your pavers and surrounds – such as charcoal pavers and an Antique or Kiama interior. But if you want to make those interiors pop, then use a white or sandstone paver. If you really want your interior to pop, you cant go past the vibrance of Bahama or Maui – and there’s a reason why these have been two of our most popular colours for the last few years.

In the end though – the only thing that matters is that you pick a colour that you’re going to like looking at – because chances are, you’re going to be looking at it for about 15 years! To look at some different pools, go to our Liner Gallery – just select the colour you’re thinking of, and it will filter out the others.

Testing your pool water (chemical balance is important)

As a pool owner, it’s important to keep your water ‘balanced’. The best time of day to test your water is first thing in the morning, and after the filter has been running for an hour or so.

The correct chemical balance varies depending on your pool interior finish. For domestic purposes, for a vinyl-lined pool or Aqualux Pool finish, we recommend the following levels:

pH: 7.4-7.8

Total Alkalinity: 100 – 150ppm

Calcium Hardness: 200 – 400ppm

Free Chlorine 1 – 3ppm (Non-Heated Pool) or 2 – 4ppm (Heated Pools)

Stabiliser 30 – 50ppm

Saturation Index -0.1 – + 0.4

When collecting a water sample from your pool, take it from around the middle of your pool (rather than from one end), and as far as possible from any return jets or the skimmer. Using a clean container or bottle, hold it upside down so that the opening is facing the pool floor, and insert it into the water, about elbow deep. Turn it over and allow it to fill before bringing it back out of the pool.

If you’re taking it to your pool shop for testing, go straight there – don’t stop off at the shops on the way there, as your sample can degrade after a period of time – even 15 minutes in a hot car can skew your results.

If you’re using test strips, take care to follow the instructions from the manufacturer. A basic rule of thumb is to quickly dip the strip in and out of the sample container (not straight into the pool) and hold it still (don’t shake it or flick the water off) – just hold it still for 15-20 seconds. Immediately check the colours against the strip on the back of the test strips container – your most accurate results will be at 15-20 seconds, as the colours can continue to develop as time goes on. The most important readings you’re looking at are Free Chlorine and pH.

At home test strips are a convenient way to keep tabs on your water quality – most people will do these weekly, with a proper test with their pool shop once a month.

NOTE: If you have just put a pool cover on your pool, be aware that your chemical consumption will be reduced by about half. If you have an automatic dosing system, you should turn it down to around 50%, and monitor your chlorine levels daily, adjusting settings to suit until they have stabilised.

Fibreglass Pool Resurfacing

If your Fibreglass pool is over ten (10) years old it is probably starting to show some signs of surface degradation –  both above the water level and below the water level. Fading above the water level is just weathering from the sun constantly beating down on the plastic resin surface of the Fibreglass gel coat. The UV in the sun’s rays attack the plastic and cause it to degrade and fade over time to the point where the surface becomes rougher and may start to attract stains and even develop osmosis.

Often, when a fibreglass pool is being emptied for renovation, as the water level drops, you can see the full extent of the degradation, and the gel coat is often in much better condition above the normal water line than below. This is because the chlorine used to keep the pool clean over all the years is also an “oxidising agent”, and it will speed the aging process as it oxidises the fibreglass gel-coated surface to become bleached and faded looking. The surface also develops a “rough” feeling to the skin, and is no longer smooth like it was when it was new. If your pool has been overchlorinated or kept at incorrect chemical levels, this degradation will occur much faster than it should have. The result is the same though – it means algae and stains cling onto the surface more easily and make the Fibreglass pool surface much harder to keep clean. “What can I do to fix my old fibreglass pool surface?” is a common question.

While we have been manufacturing Aqualux interiors to be fitted into damaged fibreglass shells for many years, in the last 3-5 years, we’ve really perfected the process. ABGAL have patterns for many popular fibreglass pool models on file, so often, there is no need for your fibreglass shell to even be measured. If you know the brand and model, we can make a new Aqualux interior to fit your pool shell perfectly, and it can be delivered ready for installation before your pool has even been emptied – meaning minimum downtime, reducing the risk of your fibreglass pool shell popping out of the ground.

Unlike traditional fibreglass resurfacing methods such as painting, rendering or re-glassing, your new Aqualux interior could have your pool ready for swimming again in just a day and a half – and in some cases, you can even recycle your water. We have portable water storage bladders enabling your water to be pumped out and stored onsite, ready to be pumped straight back in again when the new Aqualux interior is in!

You can see more about resurfacing your fibreglass shell with Aqualux, and see some before and after photos on our main website.

What makes Aqualux better than a regular inground pool liner?

An Aqualux pool finish is a specialist, flexible pool interior which is designed for Australia’s harsh climate, to out-perform other similar pool finishes.

The Aqualux difference starts with the chemistry. Some products perform well under certain conditions, and others just don’t make the grade – and it is all in the chemistry.

First we need to understand a little about the conditions, and that’s why Aqualux was developed here in Australia, specifically for Australian conditions. By studying the environmental conditions, we have been able to see over the years how small adjustments to the chemistry have improved Aqualux, and increased its performance.

The performance is measured by the resistance to the environmental elements like the sun and the chemicals in the pool water (like chlorine and salt). By carefully monitoring the performance of the pool finish, and adjusting the chemistry little by little, Aqualux has become the ultimate flexible pool interior for the Australian environment. It has taken many years of testing and expertise, and the end result remains a closely guarded secret that many try to immitate, but none have sucessfully reproduced.

Australia’s climate punishes standard grade plastics. A standard inground pool liner might work quite adequately in Asia, Europe or the Americas, but bring it to Australia and its a different story alltogether. That’s why the formula is the key and how chemistry makes all the difference to making your pool finish longer lasting. We have our own chemist with almost 40 years’ experience, employed to make sure each manufactured batch of Aqualux is carefully monitored and quality tested to meet our strict standards.

This means you can be assured that your Aqualux pool finish has been expertly manufactured to suit Australia’s harsh climate. But it is still one of the easiest surfaces to keep the pool balanced and looking good ready to swim. It is soft and silky to the touch which means it is more comfortable to swim in for you and your family. No rough edges or scratches or scuffs to worry about.

Don’t just install another pool liner. Choose the finish that’s passed the test of time, and been the choice of thousands of pool owners across Australia since 1976 – an Aqualux pool finish.

My glass pool fence has exploded – how do I clean it up?

It’s one of the things you hope never happens to you. Maybe you were there and heard a loud bang – or perhaps, you didn’t know it happened until you looked at your pool and noticed a glass fence panel missing.

While it’s not common, it’s certainly not unusual for glass pool fences to suddenly shatter without warning. (Normally into a thousand pieces – all over the pool deck and sometimes inside your swimming pool!)

It happened to me just last week and this was the second pool fence panel to shatter in three years! On both occasions, we have been fortunate that no one was near the pool at the time, so all we’ve had to deal with was replacing panels and cleaning up the broken glass.

The first time, it just made a mess over my timber deck, but this time, a lot of glass fell into the pool. My pool has an Aqualux vinyl interior as they are so nice to the touch, and I must admit, I was a little worried falling glass may have cut through the surface.

I Googled “how to clean glass from your pool” and there were a few articles, but not many relating to an “exploding fence panel” so I thought I would share my experience to help others.

My immediate thought was to vacuum the broken pieces using the pool vac. I placed two skimmer socks inside the skimmer basket to trap any glass fragments and stop them flowing through to the filter. Then I connected the vacuum and proceeded to slowly move across the glass pieces.

This was my first mistake as although the fence shattered into small 10mmx10mm size pieces, many of them were clumped together and too big to fit through the vacuum head opening or suction hose.

So I changed tactics – this time opting for a handheld broom and long-handled dustpan.

This worked a treat!  Working very gently and slowly, I broomed pieces of glass into the pan, just a little at a time, so I could easily lift the dustpan out of the pool (without dropping any pieces) and empty the glass into a large bucket.

I repeated the process until I had swept up all the pieces that I could see. By the way, it is much easier to see glass in the pool in full sun as the glass reflects under the water.

After removing all the large pieces with the dustpan and broom, I vacuumed the entire floor area carefully to pick up smaller slithers.

Total clean up time took about 2 hours.

A week later, I am very happy to report that my pool fence company has replaced the panel, and my Aqualux pool finish was up to the challenge, and proved tough enough to withstand the glass and has no cuts or leaks!

Are you thinking of buying a robotic pool cleaner?

In the past, almost everyone used a suction cleaner or pool vaccuum, and we all became accustomed to swimming around the hose, and listening to that ‘tick tick tick’ sound whenever we were near the pool!vacuum hose

However, in the last few years, robotic cleaners have become quite affordable, so are gaining popularity with pool owners. But while it is true that a robotic cleaner can be used in any pool, not every robotic cleaner is suitable for every pool.

If you have an abrasive pool surface such as pebble, you’ll need a cleaner that is strong enough to scrub the surface clean, and durable enough to tolerate any wear against the cleaner skirting.

On the other hand, if you have a soft and flexible surface finish such as vinyl, you need to ensure a robotic cleaner has no sharp edges, and that the tracks and rollers are gentle enough to not cause wear on the pool finish. With all pool finishes, it is also important to ensure there is enough clearance on the underside of the robot to avoid rubbing and scraping against the surface.

So which is better to use? Robotic or suction? It really is a matter of opinion. Suction cleaners have been the norm for many years in Australia, and they generally do a pretty good job, for a very reasonable price. But all pools are different, and no cleaner is perfect (there is usually a corner or step, or some other spot in every pool where the suction cleaner always seems to miss!)

Plus you have to wrestle with the cleaner and hose when you want a quick swim as most pool owners just don’t bother to remove the vacuum from the pool. And when you do finally take the vacuum out, no one ever lays the hose out nice and straight, to minimise any effects of hose kinks on the cleaner’s performance. (Suction cleaners rely on the hose to help control the area they cover and the direction they take).

I’ve personally owned a number of suction cleaners over the years, and a couple of robots, so I thought I’d put together some of my thoughts, to help anyone who is tossing up between a suction cleaner and a robotic cleaner.

Robotic cleaners are designed to be put in the pool once or twice a week for up to 2 hours to roam around the pool in a random pattern and vacuum all the dirt and leaves from the floor and walls. The biggest issue I have with robots is the cleaning! That’s right – you need to clean the cleaner! They need to be cleaned every time they do a full pool clean.

I liked my suction cleaner’s handling of the dirt and leaves, it just sends it all to the pool filtration system. I found my sand filter much easier to clean than the cartridges of the robot – it was just a matter of switching off the pump, turning the valve, then running the pump until the waste water was clear, selecting rinse for a minute and then back to normal filtration. Quite easy really, and only takes about 7 minutes.

The robot takes about 7 minutes each time I clean it – and I have to do this at least every week – whereas I only backwash my sand filter every 4-6 weeks. However, I love the fact that my pool has NO cleaner in the water most of the time and no annoying “tick”, “tick” sound or the surface of the water rippled all the time.

And, when I go for a swim, I jump straight in and don’t have to remove the suction cleaner and store it alongside the pool edge. Now putting the robot in the pool and getting it back out requires a bit of strength, especially getting it out when as you have to wait for the water to drain out before lifting it otherwise it is quite heavy.

Now – the effect of the cleaners on your pool finish. The suction cleaners are often left in the pool all the time as some people choose to swim with them as it is easier. The problem is, for 8 or more hours a day in summer, the suction cleaner is rubbing over the pool surface. If you have an abrasive surface, this will wear the cleaner skirt and some other parts. If you have a soft surface such as PVC, the suction cleaner can rub and wear the surface over time, and if it doesn’t move evenly over all parts of the pool, you may see its common path in form of a wear track, usually around the wall to floor junction.

The concept of a robot being more compatible with all pool surfaces comes from the fact they are only used for a short period of time – BUT you need to make sure you have the correct tracks and rollers for your pool surface finish.

If your pool surface is quite abrasive, then the robot will have less wear on its tracks and rollers as it is only used for relative small amounts of time, but the wearing parts need to be compatible otherwise you will need to replace them quite quickly. If your pool has a soft finish, the robot makes sense as again it is only used for small amount of time, but you need to make sure the areas of contact with your pool finish are compatible so as not to create wear spots.

One of the considerations for your pool before you purchase a robot if you have a softer finish is to ensure the shape of the surface is free of sharp edges, and that there is enough clearance of the underside of the robot to avoid rubbing and scraping these edges, as the hard plastic of the robot body can cause abrasions.

If you ever suspect your robot has caused abrasion to your pool finish, just check the tracks and the underside of the unit – you will likely see some of the pool surface colour on it and maybe some worn plastic parts.robotic cleaner print rub off on tracks

So in my opinion, if you are on a budget or don’t mind swimming with the hose and cleaner, or removing it every time you swim, a suction cleaner will work for you.

If you want the clean look of a pool without a hose and cleaner 99% of the time and happy to rinse off the cartridges after every clean, then a robot will suit you.

Remember, no cleaner is perfect, but they sure beat having to set up the vacuum hose, handle and brush and cleaning the pool manually yourself!


Is Aqualux suitable for a Glascon Pool?

A Glascon pool is a little unusual, as it has fibreglass walls and a concrete floor. The construction of this pool is a mix of two styles used for swimming pools – firstly – the wall is made from glass reinforced plastic (commonly known as ‘fibreglass”) and the floor is reinforced concrete.

The fibreglass wall has a smooth gel coat finish and was usually blue in colour, and the concrete floor was either painted or finished with a waterproof marble render. The problem with this system is, there is no chemical bond between the concrete and the fibreglass, so there is a risk of leakage at this joint. If there is some ground movement over time, the joint can open up slightly and pool water will leak out of this join, between the two structural elements.glascon-pool-steps-ready-for-measuring

The simplest and easiest way to fix this leaking, is to install an Aqualux pool finish. The design of the Glascon pool is similar to a prefabricated vinyl pool and therefore it is a very cost effective and straight forward process. The pool has an even wall height all the way around, and the floor slopes down into a bowl sort of shape to make the deep end. Having vertical walls means the vinyl finish will be economical and easy to fit. The pool just needs some simple preparation of new eyeballs fittings suitable for vinyl, a fixing extrusion fitted at the top of the wall and a face plate or under water extrusion around the skimmer opening.

The empty pool is measured for the Aqualux finish, which is made into a one piece waterproof membrane at the factory and then fitted in a day and the pool filled back again with water.

An Aqualux PVC membrane is an excellent solution to a leaking Glascon pool.

glascon-pool-wall-floor-leaking

Can I pebble over a leaking fibreglass walled pool?

At least once a month we hear from someone who has a fibreglass walled pool, who has made the mistake of resurfacing it with pebbles.

This ‘Glascon’ pool in Brisbane is one of them. Glascon pools have a concrete base, and use a rolled fibreglass sheeting for the walls. A common issue with these type of pools which have a separate base and walls, is leaking in the joint where the walls and floor meets.

This leak between the walls and floor joint was precisely the case with this pool. The most effective way to solve these leaks is with the installation of a flexible, waterproof membrane such as a pool liner, or an Aqualux pool finish.

However, when the home owners approached some pool builders for quotes to repair the pool,  one told them resurfacing with pebble would be effective, and add more value than a vinyl liner. As you do, they trusted their pool builder’s advice, and decided to go ahead with the pebble coat.

Costing many thousands of dollars to install, the pebble interior lasted around 12 months before it failed. It leaked, it cracked – and then it literally fell off the walls.

The only thing the pebble added value to was the builders wallet.

pebble over fibreglass
The pebble finish cracked and fell off after 12 months.

Naturally that pool builder has since left the Brisbane area, and not covered by insurance, the homeowners were left to sort out the mess themselves.

Luckily, this time around they found themselves in contact with a reputable pool builder. And rather than just go ahead and build a whole new pool inside the existing one, he suggested installing a pool liner, and put them in touch with Complete Pool Liners.

Complete were able to resurface the existing pool shell with an Aqualux Pool Finish, creating a waterproof membrane which covers the entire surface. The pool was finished and ready to swim within 2 weeks. The owners were happy with the price, and couldn’t be happier with the result.

fibreglass pool resurfaced with Aqualux
The Aqualux pool finish puts a waterproof skin over the entire pool shell.


Correct chemical balance for a vinyl lined pool

Getting the water balance right in a vinyl lined pool is a little different to a pebble, tiled or other finished pool. Regardless of whether it is an above ground pool or an inground pool, the water in a vinyl finish pool all needs to be balanced and stabilised, and regularly checked for imbalances. The following levels ensure the best care for both your family and your pool, for a vinyl lined /Aqualux finished swimming pool. DO NOT use these levels on any other pool finish.

Recommended levels for a vinyl lined/Aqualux pool:

pH…………………….. 7.4 – 7.8

Total Alkalinity……  100 – 150ppm

Calcium Hardness..  200 – 400ppm

Free Chlorine……… 1 -3 ppm (non heated pool)

2 – 4 ppm (heated pool)

Stabiliser…………..  30 – 50 ppm

Saturation Index..  -0.1 to+0.4